These red velvet brownies combine my favorite features of frosted brownies and red velvet cake. They’ve got all the flavor of red velvet cake in the form of a chewy brownie slice.
Just like your favorite red velvet cake, they’ve got the fluffy cream cheese frosting, that classic vanilla and lightly chocolatey flavor, and a lovely dark red color. But I’ve transformed their light and airy cake batter into chewy brownies and baked them in a square pan.
It’s the best of both worlds!
Clik here to view.
Clik here to view.
a few recipe tips:
doubling the frosting:
Feel free to make this recipe with 2x the frosting if you like a ratio that’s more like 1 part frosting to 1 part brownie. Right now it’s more like 1 part frosting to 2 parts brownie. If you’re mostly in it for the frosting, I’m not gonna stop you!
1 batch of frosting uses half a brick of cream cheese. So if you’re just trying to use up that whole brick of cream cheese (but don’t want extra frosting), you could always double the whole recipe and bake it in two square pans.
I have to admit, I tested this recipe a couple more times than I actually needed to, so I vote option 2!
customizing the frosting:
If you’d like your frosting to be more set, feel free to increase the butter to 4 Tbsp [60 g] total. I like a light and fluffy cream cheese frosting with a texture more like sour cream frosting. This one is dollopable right out of the fridge (as you can see from the photos), but holds the shape of swooshes, kind of like cream whipped to medium-soft peaks. Adding extra fat will help it solidify more when it chills. Just make sure to let it warm up a bit if it’s not spreadable straight from the fridge.
storage:
These brownies keep super well in either the refrigerator or the freezer, and can even be enjoyed frozen. Cream cheese frosting is a perishable dairy product, and should be treated like whipped cream—so the brownies should really be kept chilled for food safety reasons.
But it just so happens that they taste amazing chilled. So it’s a win-win! They’ll stay fresh for a couple days in the fridge, and will stay fresh for a month or two in the freezer when sealed tightly. Once we’ve enjoyed a few fresh, I always pop the leftovers right in the freezer, because they taste so good frozen.
Clik here to view.
Clik here to view.
Ok so now I’m about to get a little nerdy about dessert mashups, so feel free to skip to the recipe if you’re not into the intersection of desserts and venn diagrams.
red velvet brownies mashup!
Whenever I make a dessert mashup, I try to make sure the final product represents both desserts pretty equally. And then I draw a venn diagram because I’m a dork. If one side isn’t fully represented in the center, it means I need to do a little tweaking. And if an essential feature of one dessert is left out, it means it’s probably not the best idea.
Clik here to view.
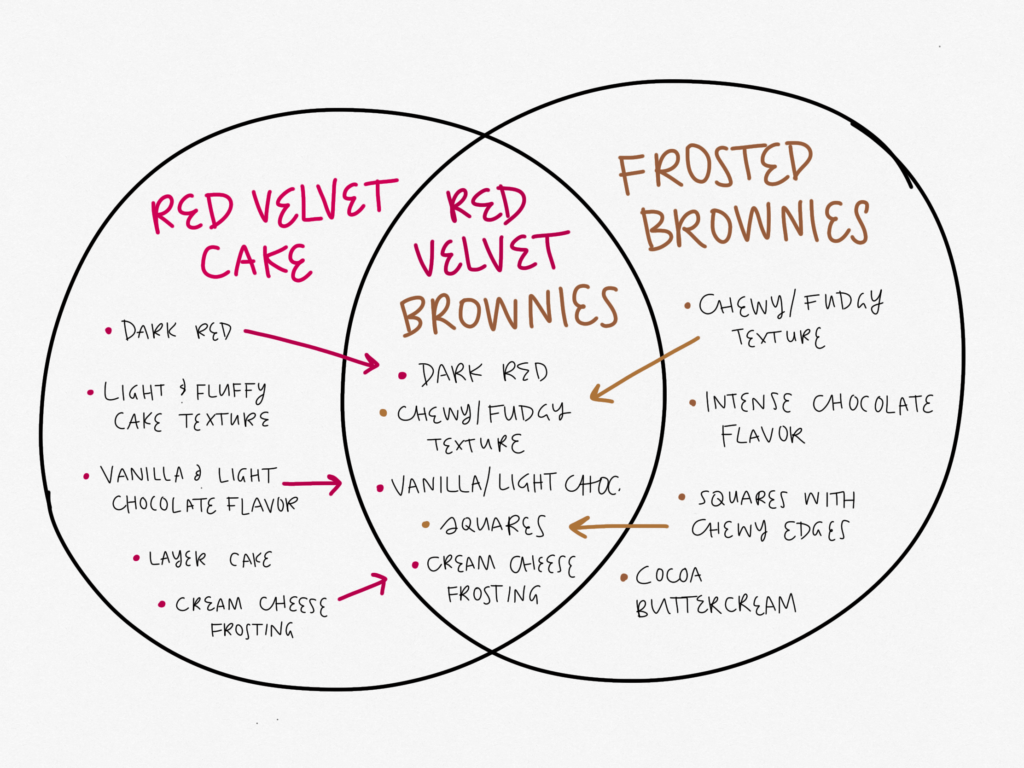
Here, you can see that the frosted brownies side is doing just fine. Cocoa buttercream swaps out for cream cheese frosting. And they’ve still got their chewy/fudgy texture.
But at first glance, they’re going to be a little lacking in chocolate flavor, compared to a traditional brownie. So to make sure they still taste like actual brownies, I increased the amount of cocoa so that it’s somewhere between the amount in a red velvet cake and a standard brownie. So now they’re a bit more chocolatey than a red velvet cake, but less chocolatey than a regular brownie.
The red velvet cake side is doing great too. Since I didn’t add too-too much cocoa powder, their red color still pops. They’ve also got that classic red velvet vanilla/light chocolate flavor, and they’re frosted with cream cheese frosting. Leaving either of those features out would be an absolute deal-breaker for me.
One thing missing is a layer cake arrangement and light/fluffy texture, since those features aren’t compatible with a brownie. But because we kept all their other important features, they still very much feel like red velvet brownies.
One other potential problem is the lack of buttermilk. Brownie batter has no room for extra liquid, but you’ll find buttermilk in most red velvet cake recipes. It’s not an absolutely essential ingredient, so we could get away with just forgetting about it. But just to add a little extra tanginess, I added a little bit of vinegar to the batter. We’re also using a tiny bit of baking powder, which doesn’t need vinegar to activate (unlike baking soda). So we’re just using the vinegar for its acidity, not its leavening power.
Without further ado, red velvet brownies!
Printred velvet brownies
Clik here to view.
Image may be NSFW.
Clik here to view.
Ingredients
For the frosting:
- 1 cup powdered sugar [120 g]
- 4 oz cream cheese [115 g], at room temperature
- 2 Tbsp unsalted butter [30 g], at room temperature
- 2 teaspoons vanilla extract [10 g]
- 1 pinch salt
For the brownies:
- Butter for greasing the pan
- 1¼ cup flour [160 g]
- 3 Tbsp cocoa powder [20 g]
- ½ tsp baking powder [2.5 g]
- 3 large eggs [150 g]
- 1⅔ cup sugar [335 g]
- ½ tsp salt [5.5 g]
- ⅔ cup canola oil [140 g]
- 2 Tbsp liquid red food coloring* [30 g]
- 2 tsp vanilla extract [10 g]
- 1 tsp white vinegar [5 g]
Instructions
- Make the frosting: Combine the powdered sugar, cream cheese, butter, vanilla, and salt in the bowl of a stand mixer with the whisk attachment (or a stainless steel bowl with a hand mixer). Mix at very low speed until the powdered sugar incorporates, and then increase the speed to medium-high and beat for about 3 minutes, until there are no more lumps and it’s very light and fluffy.
- Chill the frosting for at least 2 hours in the refrigerator, until it’s stiff enough to hold its shape, but still very spreadable.
- Bake the brownies: Preheat the oven to 350° F [180° C].
- Butter or grease an 8×8-inch pan (20×20 cm), and line with parchment (all the way around if you’d like, or just the bottom).
- Sift together the flour, cocoa powder, and baking powder. Set aside.
- Combine the eggs, sugar, salt, oil, liquid food coloring, vanilla, and vinegar in a large mixing bowl. Whisk together slowly, just until it’s fully incorporated and no longer streaky. Do not incorporate air by beating it.
- Once combined, add the flour/cocoa mixture, and fold together until there are no large clumps of flour (don’t over-mix).
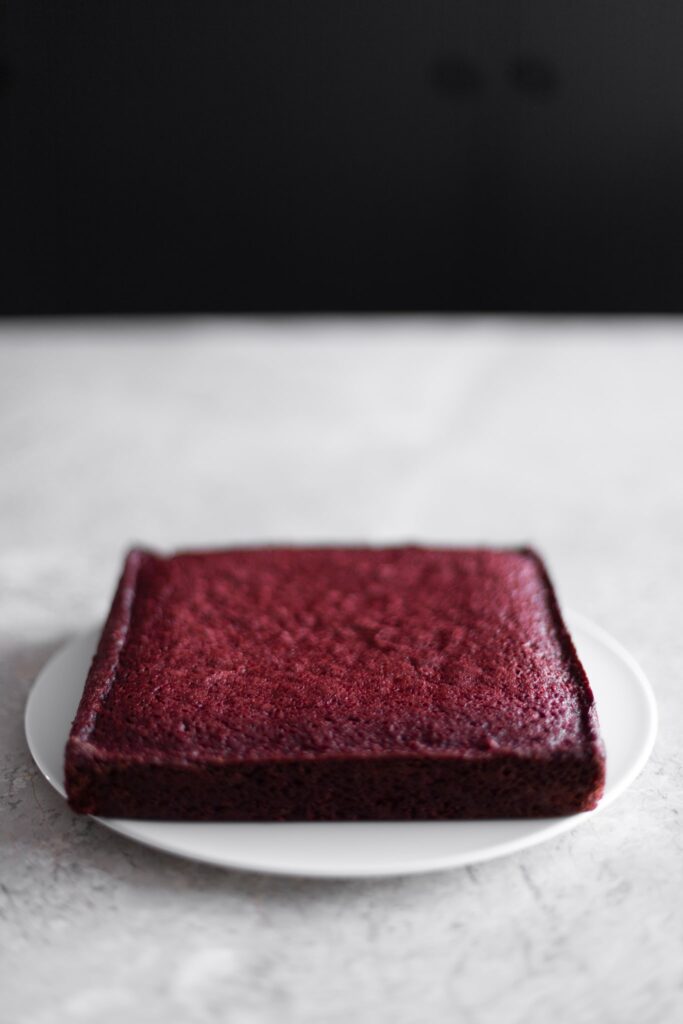
- Pour into the pan, smooth out the top, and bake for about 40 minutes, until a toothpick or paring knife inserted into the center comes out clean.
- Let it cool in the pan at room temperature for about 20 minutes, then trace around the edge with a knife to loosen it. At this point you can freeze it for about 1 hour in the pan, until the entire thing is chilled (but not frozen). This will help it slice more cleanly, but you can skip this and just let it cool to room temperature instead. Remove from the pan by gently inverting it, remove the parchment, and place right-side-up on a serving dish.**
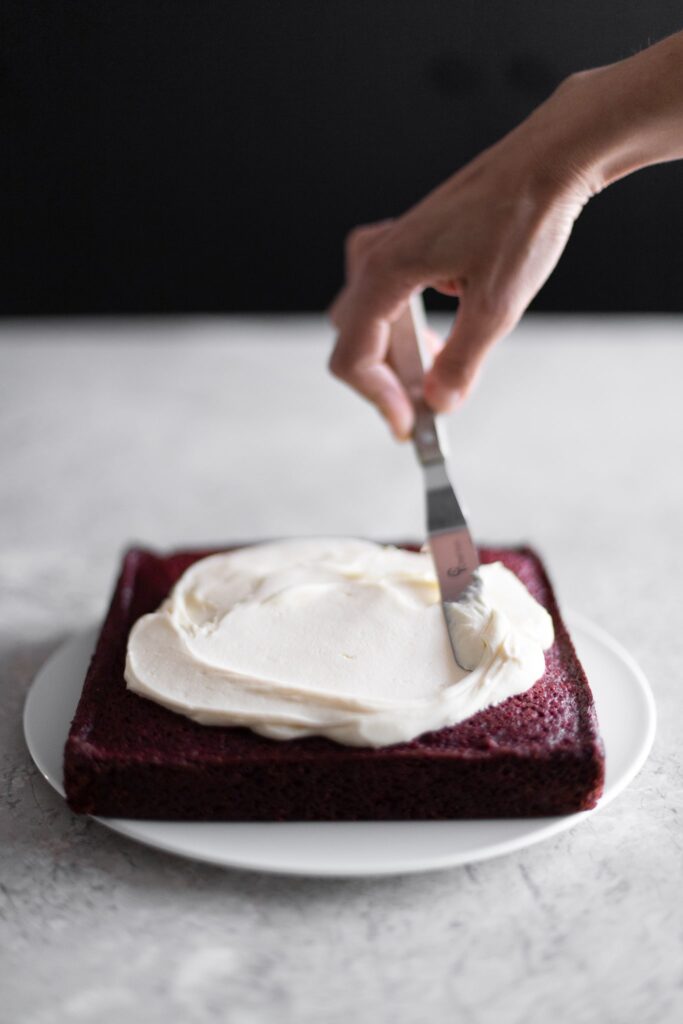
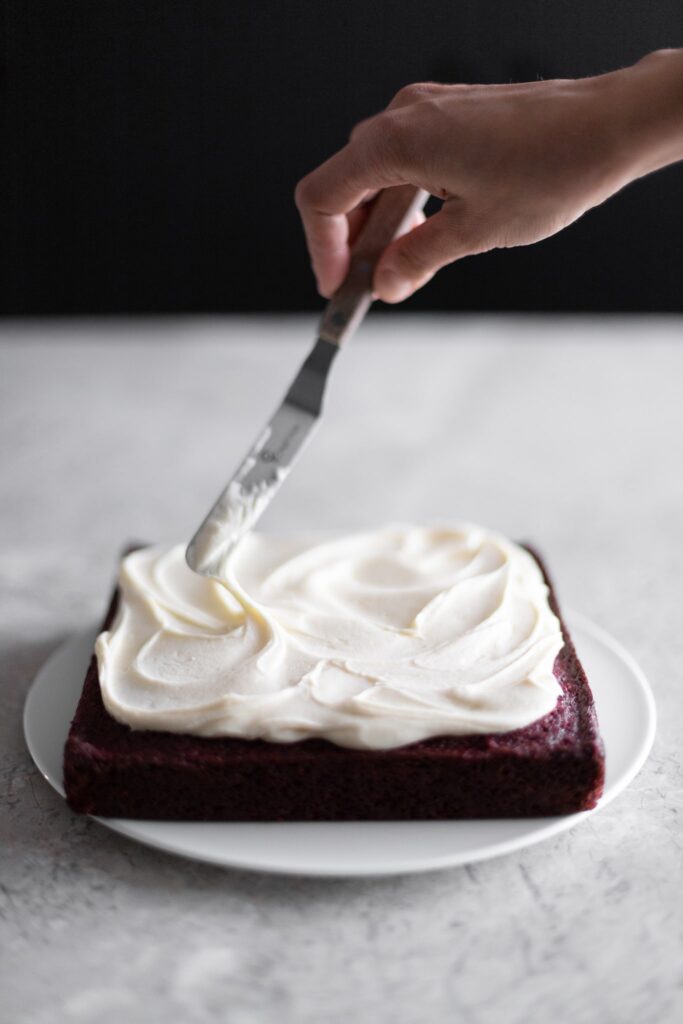
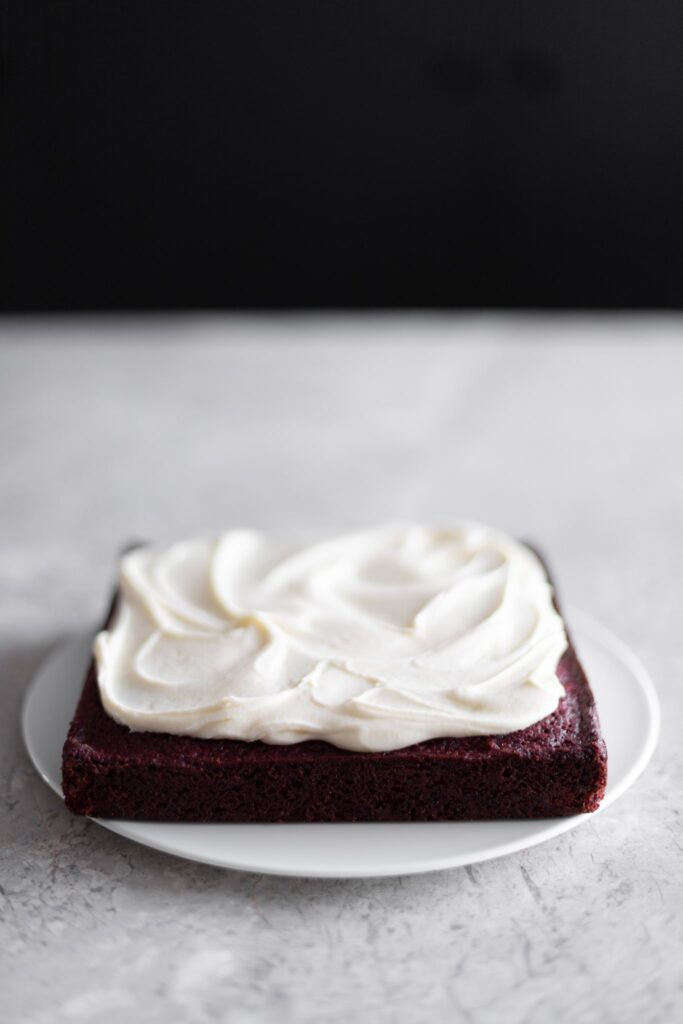
- Decorate the brownies once they’ve cooled: Dump all of the frosting into the center of the brownies. Use an offset spatula to work the frosting almost to the edges. Then make a few swoops in it with the spatula. Slice into 16 pieces.
Notes
* I developed this recipe with liquid food coloring because it’s easily accessible for most folks who read this blog. But if you have gel coloring, you can totally use it here instead. You’ll just need to use much less. Add it gradually to your wet ingredients until they’re deeply red.
Also note that natural food colorings will not dye your cake as dramatically as artificial colorings. This won’t affect the flavor, so feel free to use a natural food coloring, but adjust your expectations accordingly. And don’t use a bunch of extra liquid coloring to compensate, or it will throw off the amount of moisture in the recipe.
** If you let it chill for too long, it’ll stick to the pan a bit when you try to remove it. If so, just let it sit at room temperature for a few minutes until it’s easier to remove from the pan, and re-trace around the edges.
The post red velvet brownies appeared first on Cardamom and Tea.